1998 Dodge RAM 2500 starter rebuild
Last week the starter on my truck died. I had had some problems starting the truck, but I blamed the old batteries. I installed new(er) batteries, and all seemed fine. Until last week. The starter was dead – not even a “click” – nothing. I was just lucky that we made it home. At the grocery store it almost did not start. Finally at home it was done.
When I added up the cost of towing the truck to a shop, plus a +$200 part plus an hour or so of labor, I became really interested in trying to fix it myself. Even if I could just save the towing and labor and replace it myself. After some research, I figured out that the Dodge RAM trucks come with a very nice Denso OEM starter. A new Denso starter is almost $400. And these starters are actually fairly easy to repair.
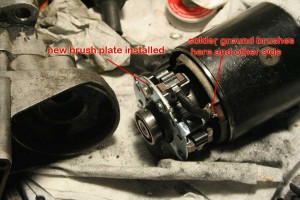
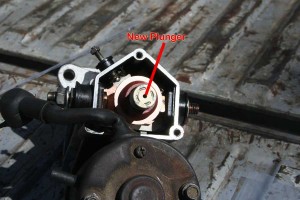
A YT video that explains how to get out that starter, got me started on this project. I got the starter out and replaced the solenoid contacts and plunger. Now the solenoid engaged properly again, but the motor was still not moving. Only smoking. So I took the motor apart as well and god! what a mess!It was full of sticky, oily dirt and could just not move. I cleaned it carefully, but one of the ground wires had come off the brush plate (probably when I took it apart). I used a butt splice to temporarily reconnect it and put it all back together. When I connected the starter to my emergency battery I got the thing to turn. So I ordered a new brush plate from LarryB’s because the brushes were worn down almost all the way. Installing the brush plate was not trivial because the wires are massive, and you have to solder them on to the old contacts. And it was ACC tournament weekend. And I hate soldering. Finally, Laura helped me with the soldering and we got the brush plate installed. last night I put it all together and this morning, I installed the starter, and … it worked!!
See below the fold for more pics and details.
Click on images for enlargification
The inside of the solenoid with the new solenoid contacts and plunger
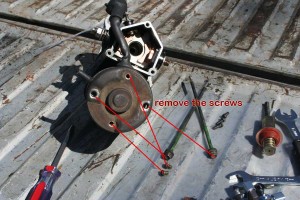
to disassemble the motor, remove the 4 screws from the motor end bell. The 2 short Phillips head screws hold the brush plate. The long screws hold the body of the motor.
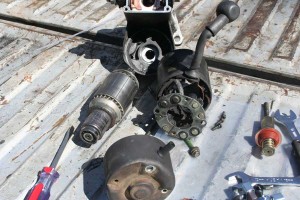
the main parts of the motor
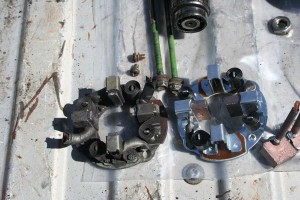
comparison of the old brush plate and the new one (with 2 brushes on the right)
Motor with the brush plate installed and the 2 ground wires soldered on to the contacts.
